How to Clean a Dryer Vent Safely
Clean lint from your dryer and accessible vent sections safely, recognize fire-warning signs, and know when to hire a professional.
- Difficulty
- Beginner-friendly
- Time
- 30–60 minutes
- Est. cost
- $10–$30
- Season
- year round
By Keepstead Editorial Team · Published September 6, 2026 · 4 min read
Last reviewed September 6, 2026
Quick answer
Clean the lint screen after every load. At least yearly, unplug the dryer, pull it forward without straining connections, vacuum the lint-screen cavity and accessible duct ends, and clear the exterior flap from ground level. Stop using the dryer if it overheats, smells burnt, or takes much longer to dry.
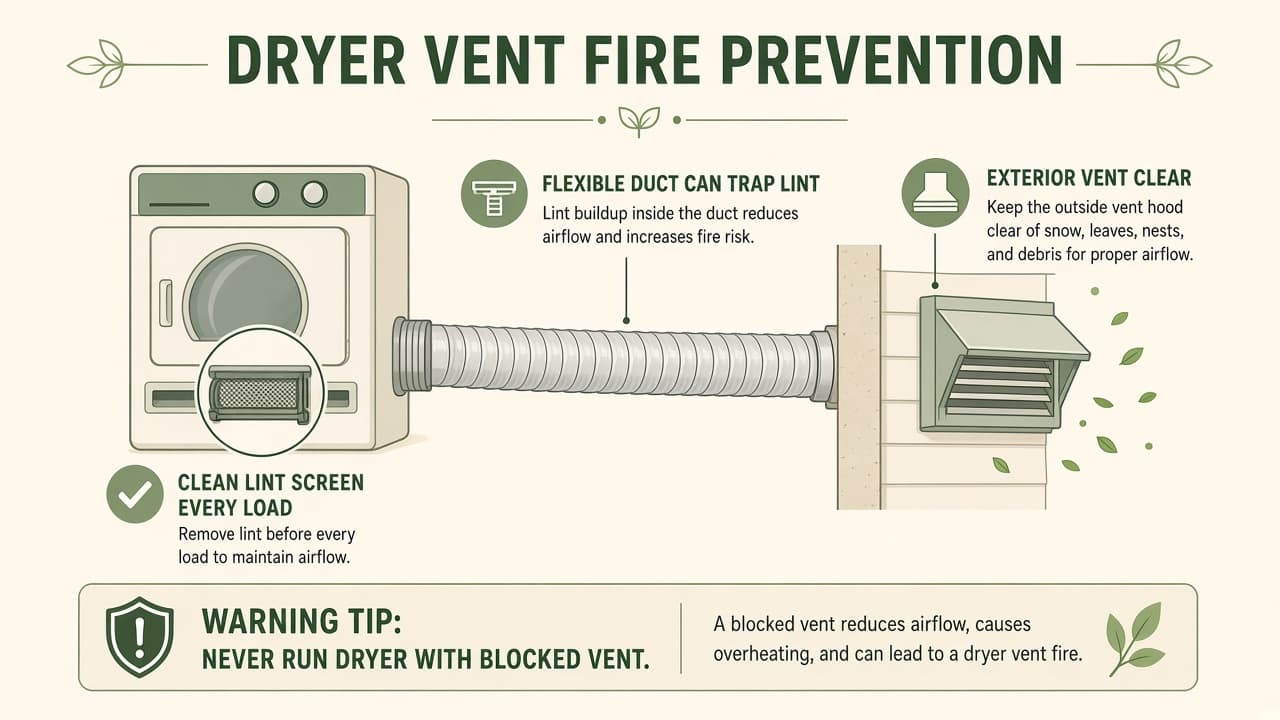
The lint screen and dryer vent do different jobs. The screen is the removable filter inside the dryer; the vent is the full duct route from the appliance to the outdoors. A clean screen does not guarantee a clear vent.
Warning signs of restricted airflow
| Sign | What it may mean |
|---|---|
| Loads take longer or need a second cycle | Airflow may be restricted |
| Dryer cabinet or laundry room feels unusually hot | Heat is not exhausting normally |
| Exterior flap barely opens while running | Blockage, crushed duct, or weak airflow |
| Lint collects behind the dryer | Loose connection or leaking duct |
| Burning or electrical smell | Fire or electrical hazard—stop immediately |
What you need
Tools needed
- Vacuum with crevice attachment
- Dryer vent brush sized for accessible rigid duct
- Work gloves
- Screwdriver or nut driver for the vent clamp
- Flashlight
- Dust mask and eye protection
Review basic DIY safety and PPE before working around lint and sharp duct edges.
Homeowner-safe cleaning steps
- Turn the dryer off and unplug it. For a gas dryer, do not move or disconnect the gas line; hire a qualified technician if access would strain it.
- Clean the lint screen. Remove lint by hand, then vacuum the screen slot without pushing tools deep into the machine.
- Move the dryer carefully. Pull it only far enough to reach the connector. Stop if the power cord, vent, or gas connection becomes taut.
- Disconnect the vent connector. Photograph the connection first. Loosen its clamp and gently remove it.
- Vacuum accessible lint. Clean the dryer outlet, connector ends, and the first accessible section of rigid wall duct. Do not force a brush around hidden bends.
- Inspect the connector. Replace crushed, torn, plastic, or screw-punctured duct with a code-appropriate connector installed correctly. Flexible foil is easily damaged and should not be scrubbed aggressively.
- Reconnect without crushing. Secure the connector and return the dryer while preserving a smooth airflow path.
- Check the exterior outlet from the ground. Remove loose lint and confirm the flap moves freely. Do not remove a wildlife guard without a plan to reinstall it.
- Run a short test. Confirm steady exterior airflow and no leaks, unusual heat, or odors.
Flexible duct caution
Transition duct behind the dryer should be short, approved for dryer use, and protected from crushing. Thin foil can tear under rotary brushes, while vinyl or plastic duct can melt and should be replaced. Screws protruding into the airflow catch lint; use an approved connection method instead.
Hidden vent runs should generally be smooth metal duct. If the route is long, has several bends, passes through a roof, or cannot be inspected end to end, professional equipment is the safer choice.
When to call a professional
Add vent inspection to your annual maintenance schedule or fall home maintenance checklist.
Bottom line
Routine lint-screen cleaning is essential, but it does not clean the vent. Limit DIY work to safely accessible sections, protect fragile ducting, and hire a professional for concealed, elevated, damaged, or persistently restricted runs.
Frequently asked questions
- Is cleaning the lint screen the same as cleaning the dryer vent?
- No. The lint screen catches debris inside the dryer, while the vent carries hot, moist air through a duct to the exterior. Clean the screen after every load and inspect or clean the vent periodically.
- How often should a dryer vent be cleaned?
- Inspect the exterior outlet and accessible duct at least yearly. Large households, long vent runs, pets, and slower drying may justify more frequent professional inspection or cleaning.
- Can I clean a flexible dryer duct myself?
- You may gently vacuum a short, accessible connector after unplugging the dryer, but foil ducts tear and plastic ducts are unsafe. Do not crush, puncture, or force brushes through flexible material; replace unsuitable ducting professionally.
Related guides
Annual Home Maintenance Schedule for New Homeowners
Plan yearly home maintenance by season—HVAC, plumbing, safety devices, exterior, and systems—with links to detailed checklists.
Fall Home Maintenance Checklist for Homeowners
Prepare for cold weather: heating checks, gutter cleaning, freeze prep, and exterior sealing—prioritized tasks before winter arrives.
Ladder Safety: How to Use a Ladder Safely at Home
Essential ladder safety for homeowners—proper setup angle, three-point contact, working rules, ladder types, and when to hire pros instead of climbing.
DIY Safety PPE: What Homeowners Actually Need
Eye, ear, hand, and lung protection matched to common homeowner tasks—from gutter work to filter changes—and where PPE isn't enough.
This guide is for general informational purposes. Conditions vary by home, local codes, and equipment. See our disclaimer.